
Canvas stretching · float frames · custom framing
Canvas framing begins with the stretcher or strainer.
Before we choose a frame, we look at the stretcher or strainer, tension, bracing and canvas edges. That tells us whether the support can stay, needs adjustment or should be rebuilt.
Support
Start with the stretcher or strainer.
Neither is automatically better. The right support depends on the painting, its size and condition, and what is already behind it.
Fixed strainer
Fixed corners create a rigid support when adjustability is not needed.
Keyed stretcher
Expandable corners allow measured adjustment. Older paintings should not be tightened automatically; forcing the corners can damage aged paint and canvas.
Mechanical & hybrid supports
Threaded, aluminum or hybrid systems can add controlled adjustability or stiffness on large and engineered supports.
Structure
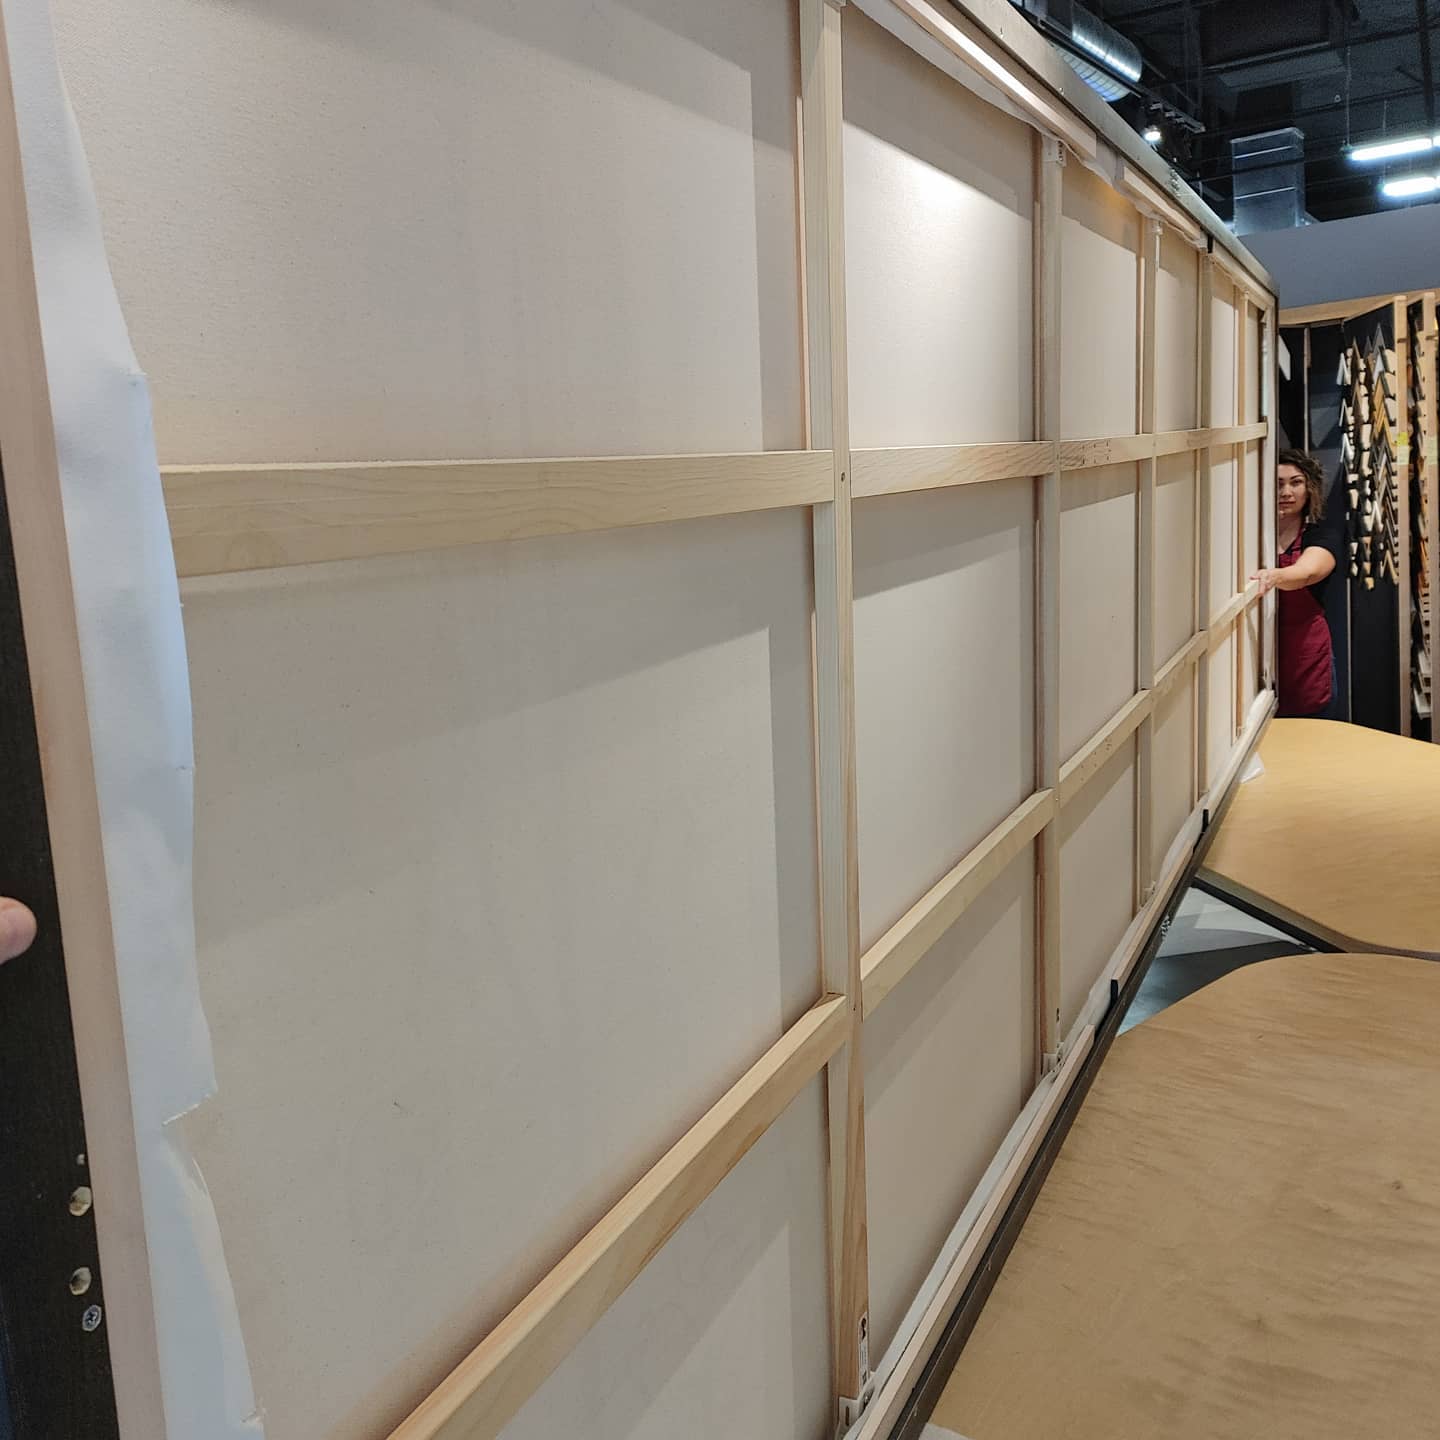
The support has to be strong enough for the canvas.
Depth, width, joinery, span and bracing matter more than the name of the wood.
Bar profile
- Enough depth and width for the span
- Raised or beveled inner edge
- Profile matched to the outer frame
Materials
- Wood, engineered and hybrid supports
- Straight, dry stock sized for the job
- Metal where long spans need more stiffness
Bracing
- Crossbars shorten unsupported spans
- Intersecting braces can stabilize both axes
- Braces stay behind the canvas plane
Protection
- Keep the support square
- Rigid backing can protect the reverse
- Structure planned for handling and installation
Stretching & framing
Stretching and frame design are planned together.
Stretching and frame design are handled as one system so the canvas is properly supported and the frame fits the actual depth and edge condition.
Stretching
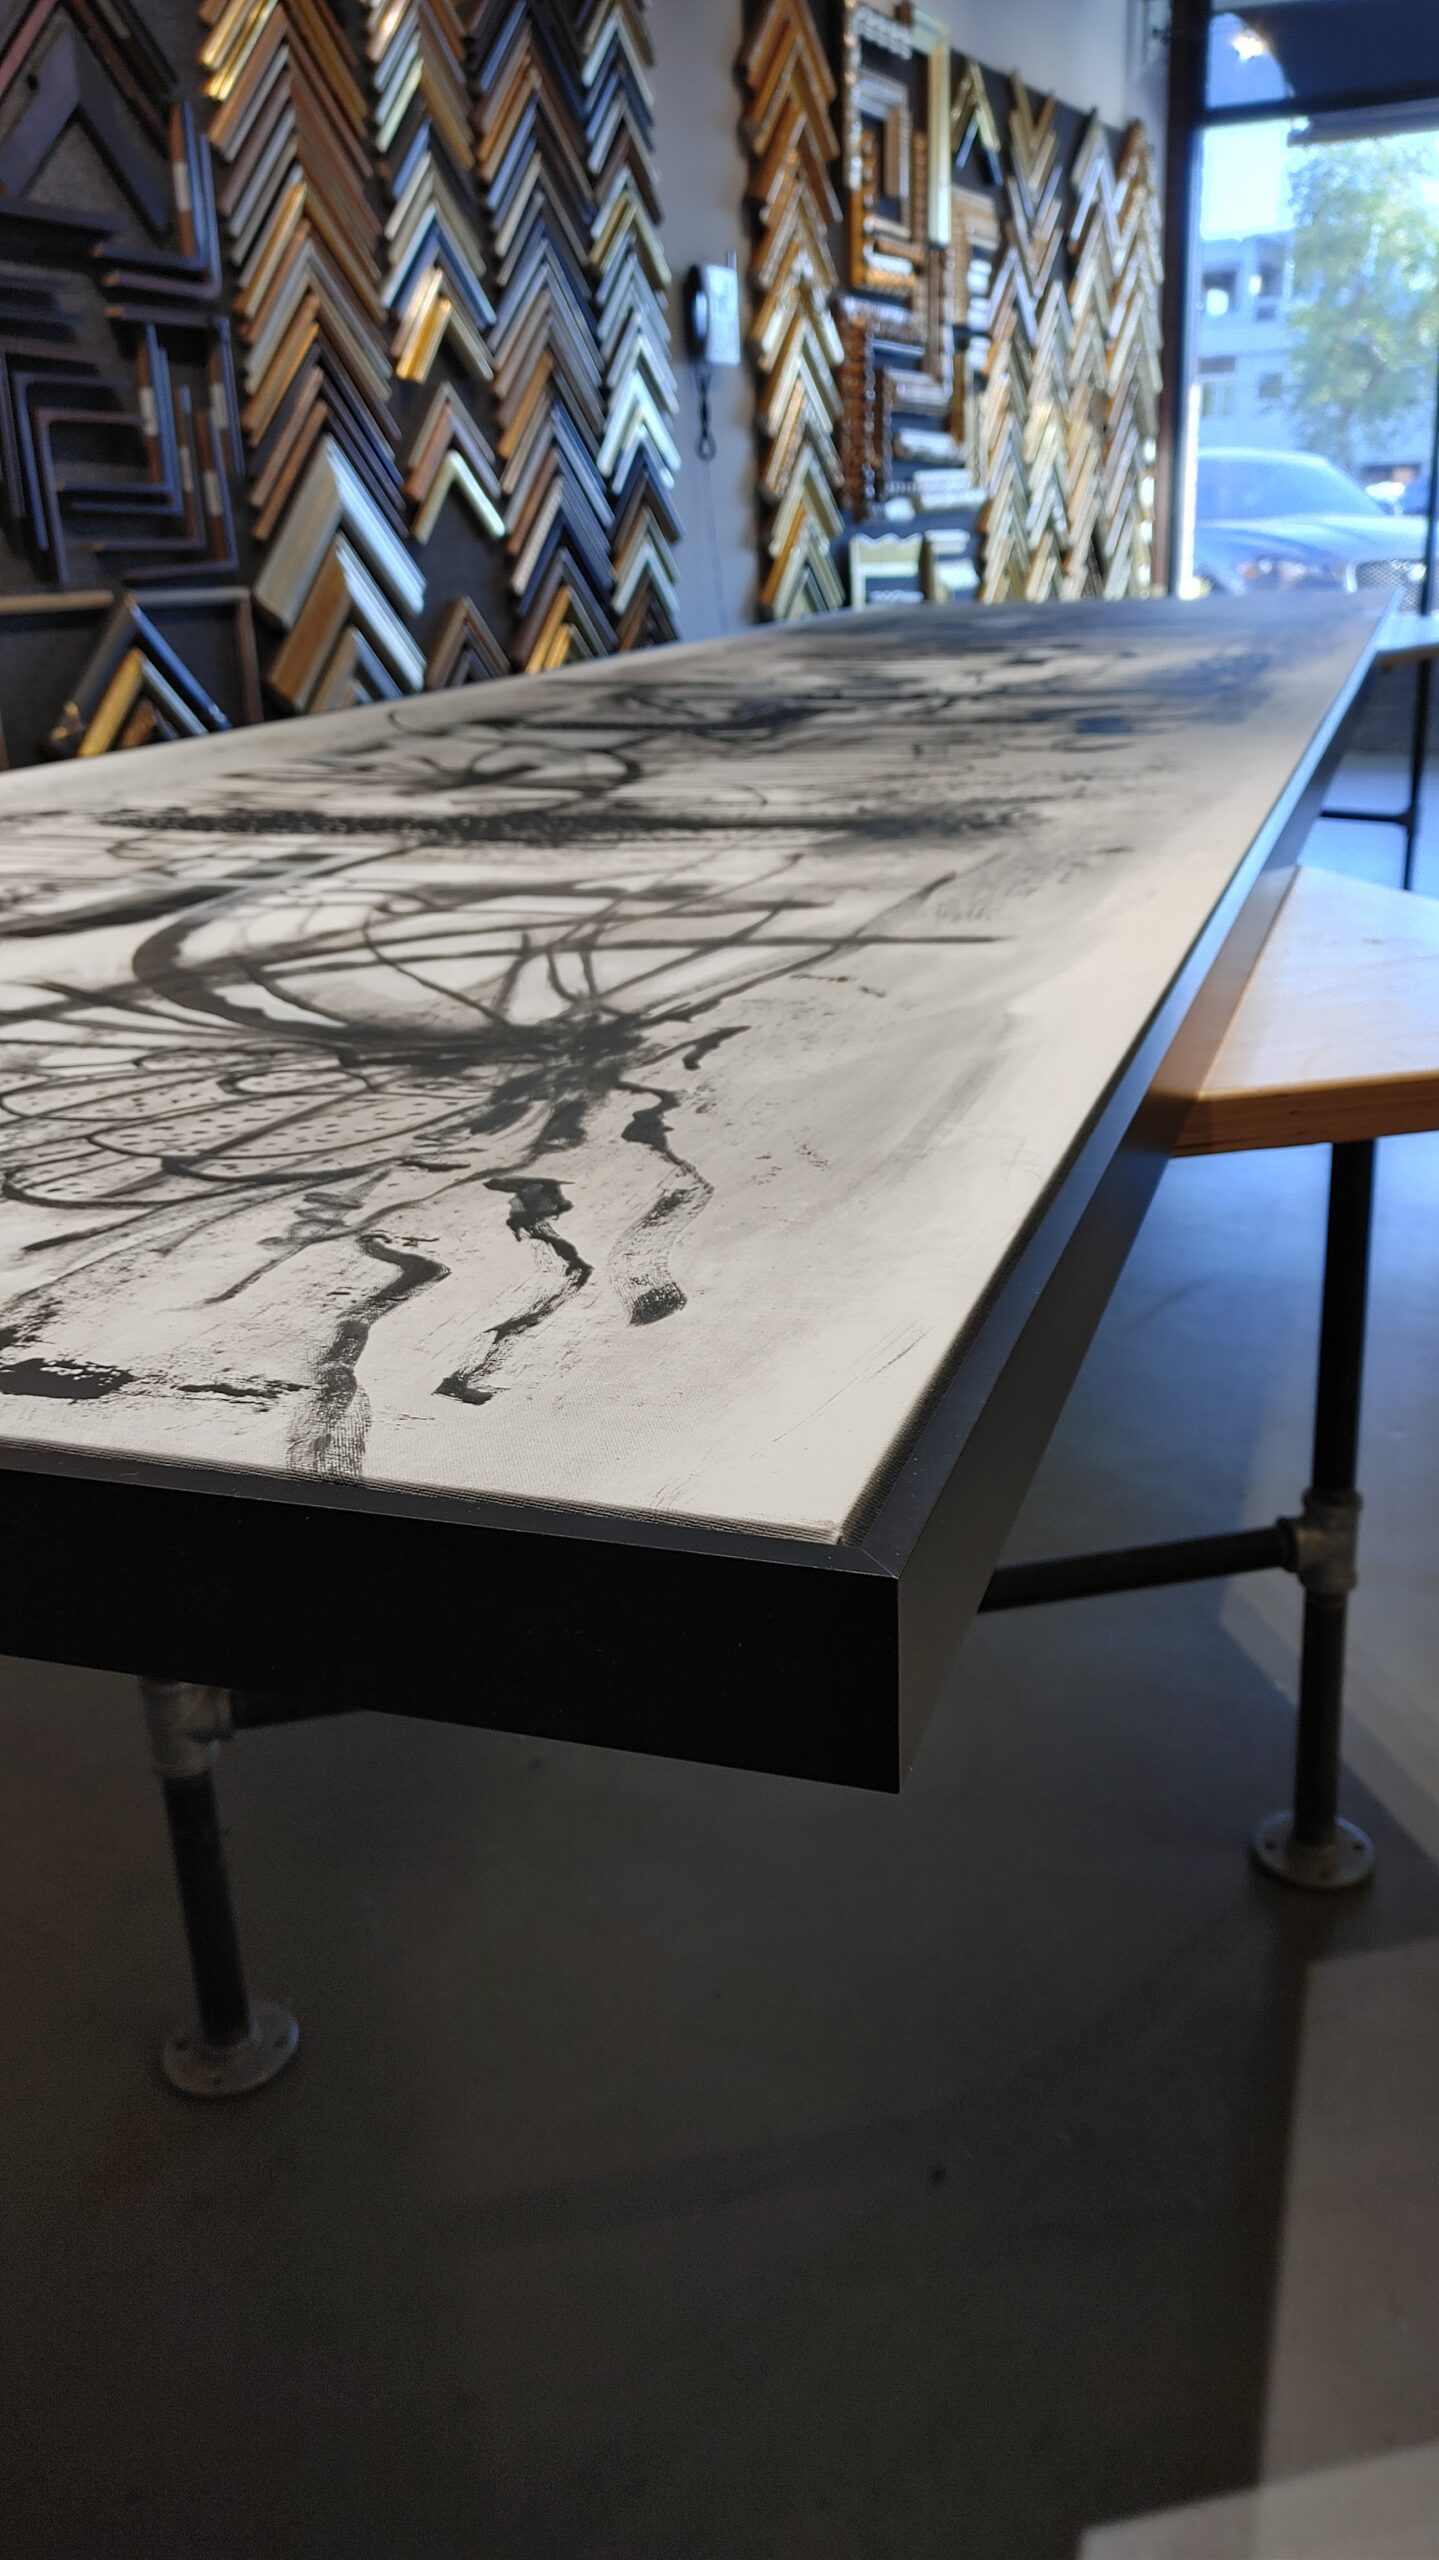
We inspect the image area, edges and condition, square the support and bring the tension up gradually and evenly. Corners and back edges are finished for the way the canvas will be presented.
Float frames
The float gap can be tight or open. Painted, raw, stapled or irregular edges affect how much of the canvas should show, and the frame must be deep enough to cover and secure the stretcher.
Large canvas
Very large canvases need planning before fabrication.
Support, handling, access, transport and installation are considered before fabrication starts.
Doors, stairs and elevators can change how a very large piece is built and moved. When crating, shipping, delivery or installation is needed, we coordinate trusted outside companies or the client’s own team.
Painting reference
Canvas & Painting Reference
The structural and preservation decisions behind stretching, backing, glazing and large paintings.
The painting and its auxiliary support behave as one system.
Canvas is flexible. The stretcher or strainer gives it shape, keeps it off the wall and controls tension. Before changing anything, we look at the existing bars, corners, keys, joins, bracing, canvas edges and paint condition.
Stretcher versus strainer
A stretcher has expandable corner joints that allow controlled adjustment. A strainer has fixed corners. Neither is automatically superior; the condition of the painting, size, original construction and intended use all matter.
Tension
More tension is not automatically better. Excessive keying can stress brittle ground and paint layers, especially in a dry environment. Slackness can have many causes, including temporary humidity conditions. Historic or fragile paintings should not be tightened simply because the canvas does not look drum-tight.
Original stretchers
An original stretcher can contain labels, inscriptions, maker marks and evidence about the painting. We do not replace it casually. If the support is inadequate or damaged, the decision may belong with a paintings conservator.
A backing board is one of the simplest ways to improve the protection of a canvas painting.
A rigid backing board protects the reverse from puncture, blocks dust and debris, reduces vibration during handling and transport, and slows rapid changes in relative humidity at the back of the canvas.
What a good backing should do
- Cover the reverse without pressing on the canvas.
- Attach to the stretcher or frame rather than to the canvas itself.
- Be rigid enough to resist accidental impact.
- Use a stable material and secure fasteners.
- Avoid unnecessary openings that defeat dust and environmental protection.
Backing plus glazing
When a painting is glazed and backed, the frame becomes a more complete enclosure. That can further reduce dirt, pollutants, vibration and short-term environmental swings. It still is not a sealed climate-control chamber unless specifically engineered as one.
Oil paintings do not need to “breathe” through an open front.
Glazing can be appropriate for paintings when it is designed correctly. Museums use glazing to protect fragile surfaces from touch, dirt, pollutants and physical damage, and to help buffer short-term environmental changes. The glass or acrylic must never touch the paint surface.
When glazing may make sense
- Fragile, lifting or vulnerable paint surfaces after appropriate conservation treatment.
- Paintings displayed where accidental contact, dust or pollutants are a concern.
- Works that travel frequently or are handled often.
- Environments where additional buffering from short-term humidity swings is valuable.
- Small or moderate works where the visual and structural tradeoffs are acceptable.
When it may not
Glazing adds weight, reflection and frame depth. Large sizes require careful material selection and adequate spacing. For some robust paintings in controlled environments, the additional enclosure may not be needed.
Frame-shop handling stops where treatment begins.
Cracking, lifting paint, active flaking, cleavage, mold, severe grime, varnish problems and structural tears are not solved by a new frame. If the paint layer is unstable, fitting the painting can create loss even when the framing materials are excellent.
Before framing
- Look across the surface in raking light for lifting or cupped paint.
- Check edges and tacking margins for tears, losses and weakened canvas.
- Note old repairs, patches, lining, labels and inscriptions before they are obscured.
- Do not brush or vacuum loose or flaking paint.
- Do not apply coatings, “feed” varnish or clean a historic surface as routine framing preparation.
Impasto and projecting surfaces
Heavy impasto increases the need for clearance and careful handling. The frame, liner and any glazing must be designed so nothing can contact high points when the piece is moved.
Scale turns small framing details into structural problems.
On a large canvas, long stretcher members can flex, corners can rack and the canvas can vibrate during handling. Bracing, frame depth, attachment points and transport all become part of the preservation design.
What we plan before fabrication
- Stretcher stiffness, brace pattern and whether the existing support is adequate.
- Finished frame weight and where the painting can be safely attached.
- Backing-board size, rigidity and fastening.
- Glazing material and thickness if glazing is used.
- Doorways, elevators, stair turns, vehicle capacity and installation access.
- Wall construction and hanging hardware appropriate to the total finished weight.
Transport in Arizona
Large paintings are particularly vulnerable to heat, rapid environmental changes, shock and vibration during transport. We plan handling and wrapping around the route and do not treat a hot vehicle as temporary storage.
Have a canvas you want us to look at?
Bring it to Old Town if it is practical to move. For very large work, call first so we can discuss size, access and handling before you transport it.