
Shadowboxes · memorabilia · dimensional work
A shadowbox begins with a secure mount.
Before we choose the decorative frame, we work out how the object will be supported, how much depth it needs and how to keep it safely clear of the glazing.
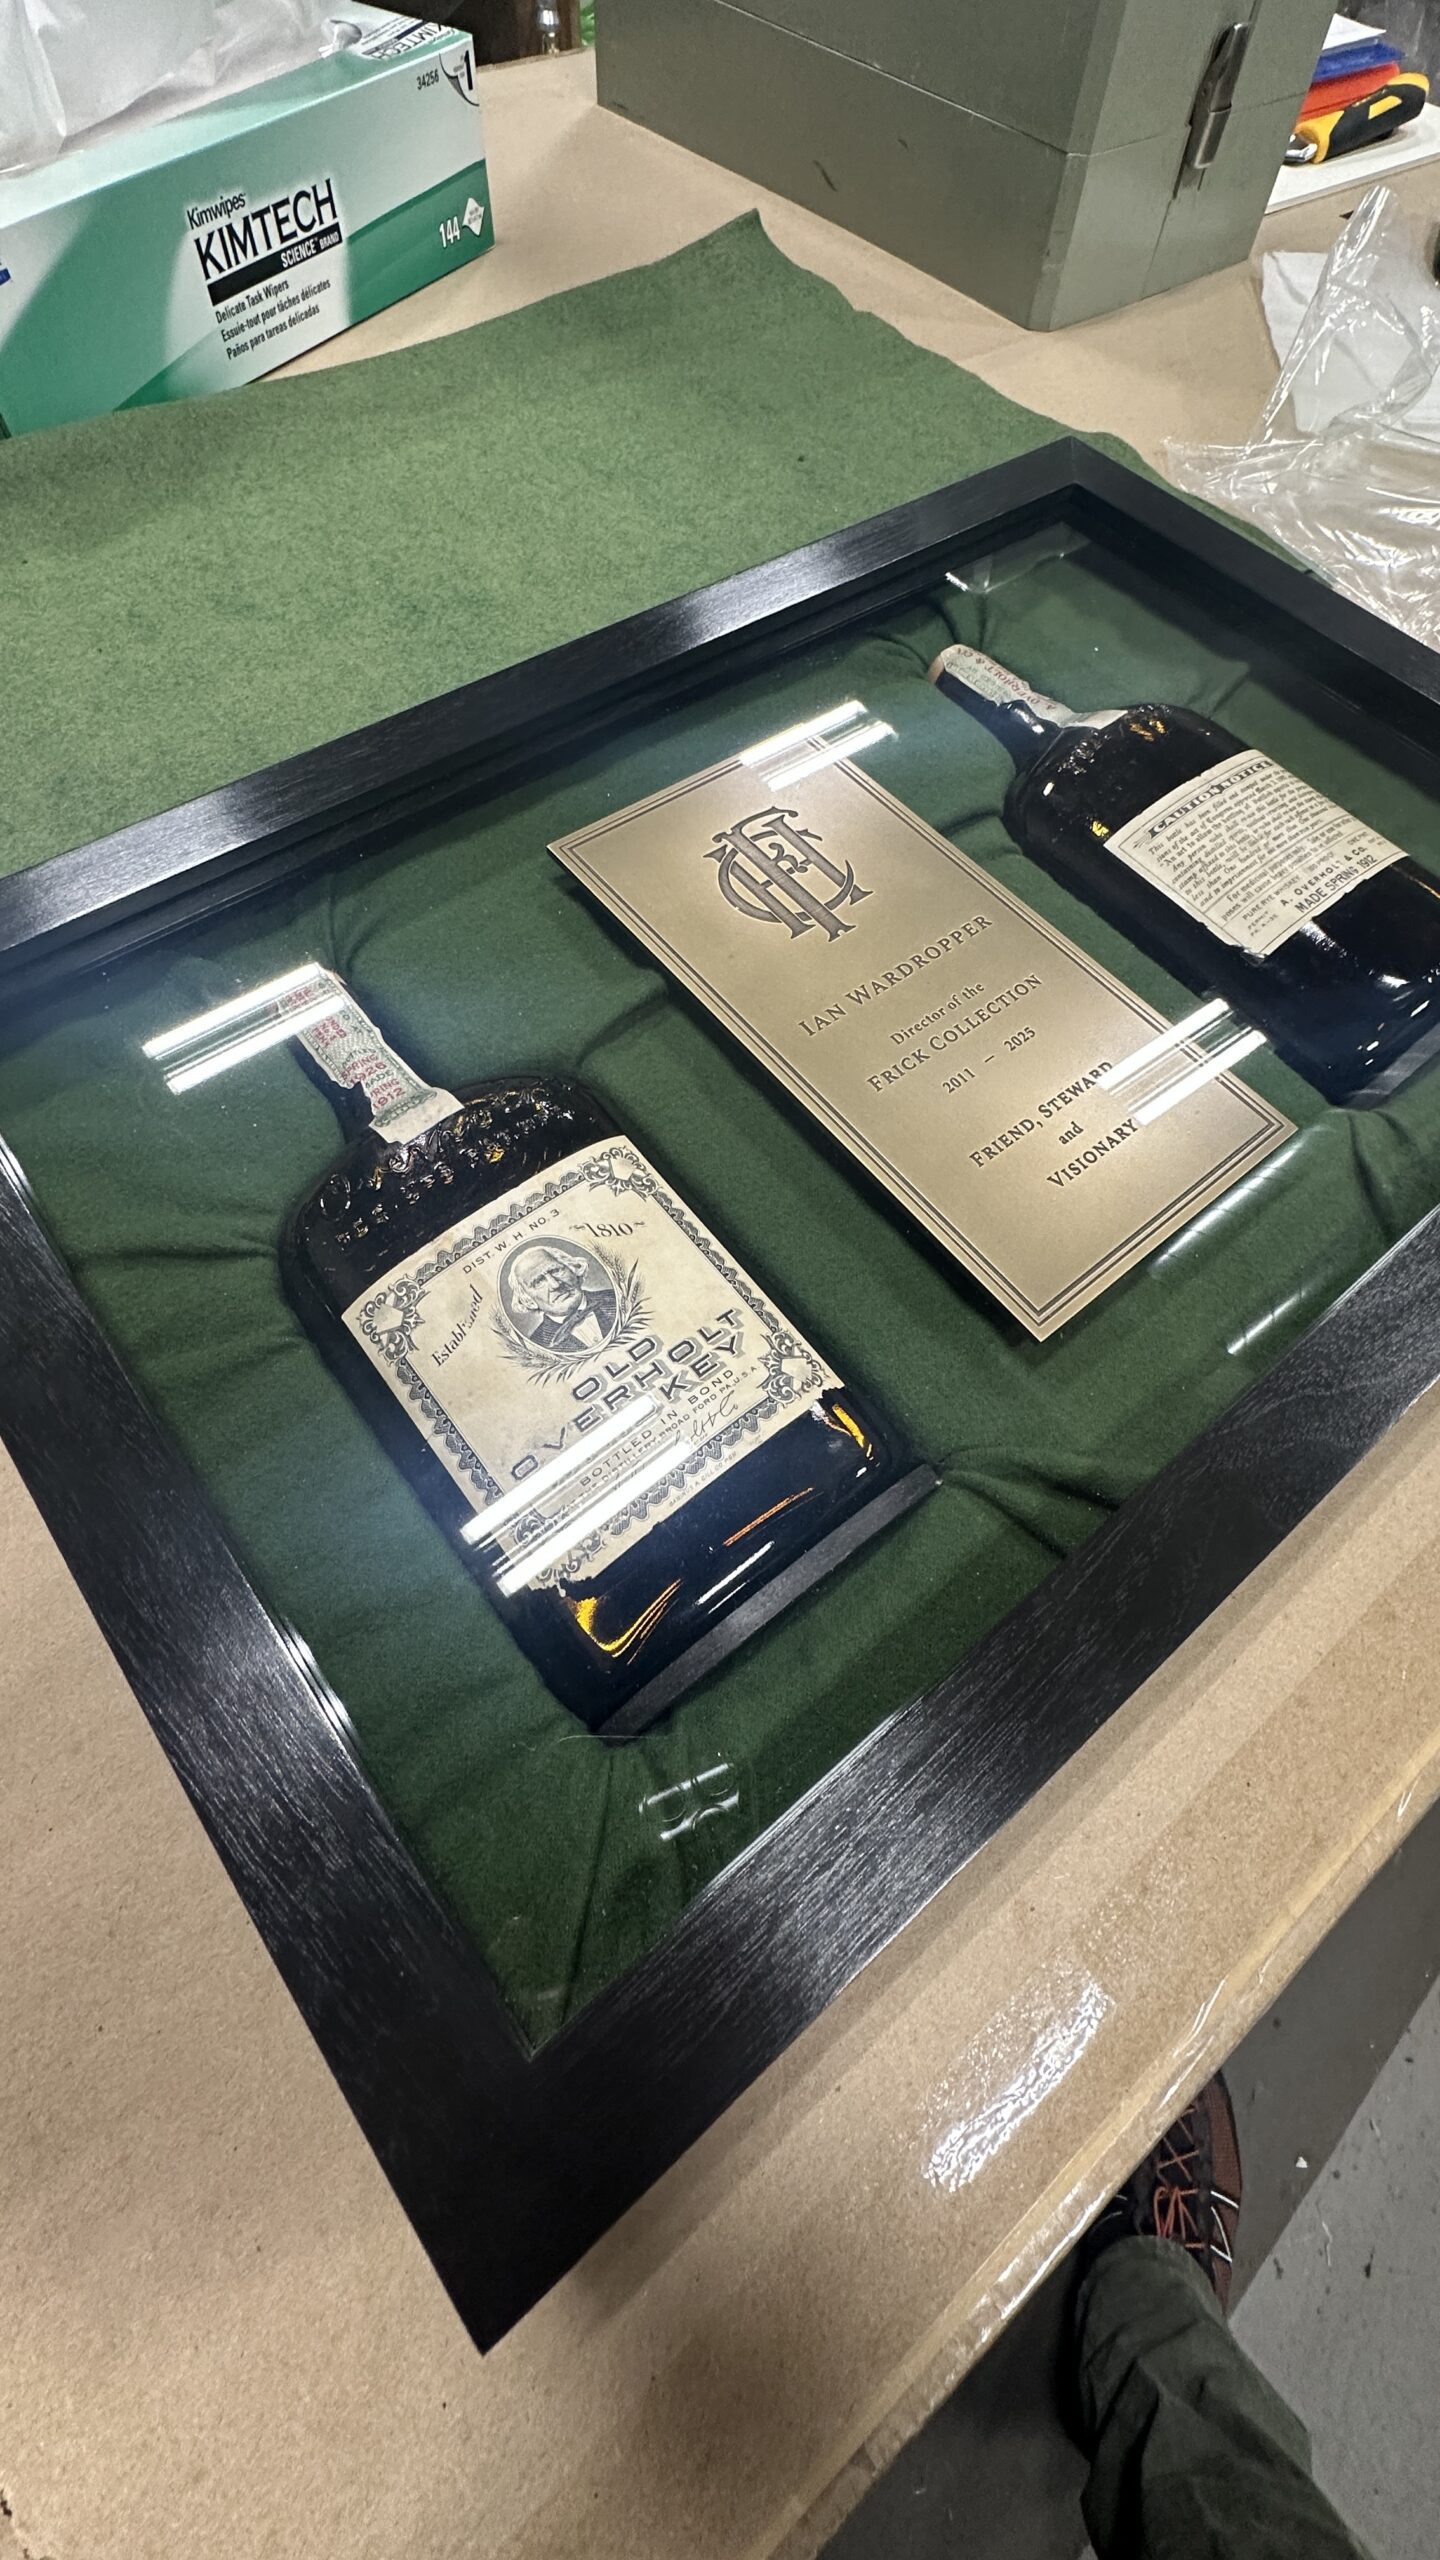
Mount first
Mounting is planned before the decorative frame.
The mount has to carry the weight, keep the object from moving and avoid unnecessary permanent alteration.
Support may use stitching, formed acrylic, hidden clips, shaped supports or recessed cavities. The method depends on the object and safe contact points.
Hidden mounts still have to support the object safely.
A good mount is secure without calling attention to itself.
Planning the depth
Shadowbox depth affects both structure and appearance.
The object needs glazing clearance, room for its relief and enough back structure to carry the mount.
Leave clearance around the object
The object stays clear of the glazing with enough room for its natural relief.
Hide the mount where possible
A liner, inner wall or recess can hide mounting hardware.
Build enough structure into the back
Dimensional frames may need more back structure because the object and mount can be heavy.
Balance the depth from the front and side
The frame profile has to look balanced from both the front and side.
Garments, ribbons and medals
Garments, ribbons and fabric objects are mounted like textiles.
Sewn supports and shaped forms spread weight more gently than glue or a few hard points.
Garments
A padded form can help a garment hold its shape, with stitching placed where seams can carry the load.
Medals and ribbons
Hard and soft components may need different attachments so metal does not pull on fabric or strike the glazing.
Mixed objects
Photographs, documents and objects can share a frame, but each may need its own support and separation.
Selected dimensional objects
Some objects fit a conventional shadowbox. Others need a different solution.
We frame dimensional objects when they can be supported safely. Very heavy or casework-style pieces may need a specialty fabricator or cabinetmaker instead.
Float or recess the object
Objects can be recessed or floated to hide the attachment.
Give groups enough space
Groups benefit from open space and clear visual order rather than being packed edge to edge.
Match the attachment to the material
Metal, ceramic, wood, paper and textile need different attachment methods.
Some objects need a different enclosure
If weight or structural risk exceeds a conventional shadowbox, we use a different type of enclosure or specialist fabrication.
How we approach an object frame
We start with weight, condition and safe contact points.
Before choosing the frame, we identify what will carry the object, safe contact points and required clearance.
- 01
Examine
Identify materials, fragile areas, center of gravity and existing damage.
- 02
Choose orientation
Decide what must be visible and how much depth the object requires.
- 03
Build the mount
Build a mount that carries the load without unnecessary alteration.
- 04
Design the frame
Choose the frame around the mount depth, background and glazing.
- 05
Fit and test
Check movement, clearance and hardware before closing the back.
Object reference
Object & Shadowbox Reference
Mount design, materials compatibility and enclosure decisions for three-dimensional and mixed-media work.
A good object mount almost disappears.
The mount should support the object at structurally sound points, spread weight, resist movement and avoid creating new stress. Museums use custom mounts for the same reason: the object determines the support, not the other way around.
Questions we answer before building
- Where can the object safely bear weight?
- Which areas are fragile, flexible, cracked, corroded or decorative only?
- Does gravity need to be distributed over a broad surface?
- Can the object move, rotate or vibrate inside the frame?
- Will the mount need to be removed later without leaving holes, adhesive or abrasion?
Mechanical support first
Brackets, formed supports, cradles, stitched attachments, padded clips and other mechanical systems can often hold an object without bonding an adhesive directly to it. The mount is designed to be strong enough for the object while remaining visually secondary.
The material touching the object is part of the conservation decision.
Acrylic, polyethylene or polypropylene foams, stable fabrics, matboards and fabricated metals are common mount-making materials because they can be shaped and isolated from the object. Wood can be structurally useful but may need a barrier when it sits inside a closed enclosure.
Compatibility matters
- Bare reactive metals can stain or corrode sensitive materials.
- Fresh paints, coatings and some adhesives can emit volatile compounds inside a closed shadowbox.
- Foams and plastics vary widely; “plastic” does not describe a single conservation material.
- Dyes in fabrics and felts should be stable and, where moisture is possible, colorfast.
- Padding should cushion contact without shedding, staining or compressing into a hard edge.
Leather, wood, paper, feathers and fabric all age differently.
Mixed-media objects can contain several conservation problems at once. A military jacket may combine wool, silk, leather, metal, paper labels and adhesives. A single mounting material may be safe against one component and harmful to another.
Garments
Garments are supported like textiles: broad support, minimal stitching through strong areas, and no dependence on a few shoulder points. Heavy medals, badges or attached hardware may need separate support so their weight is not carried by the fabric.
Leather and flexible organics
Leather can become stiff and brittle. Heavy attached elements should not hang from weak leather, and contact with reactive metals may need isolation. Sharp folds are supported rather than forced flat.
Paper ephemera in shadowboxes
Tickets, letters, photographs and labels should use the same preservation principles as works on paper even when they are part of a larger object display.
Hard objects can still be vulnerable.
Metal can corrode, plated finishes can scratch, glass can fracture and brittle plastics can craze. A mount must hold the object without concentrating pressure at edges or creating galvanic or abrasive contact.
Metals
We avoid unnecessary direct contact between dissimilar reactive metals and use inert padding or barriers where appropriate. Active corrosion is a treatment issue; it should be evaluated before an object is sealed into a frame.
Glass and ceramics
Supports should cradle strong areas and avoid point loading on rims, handles or repaired joins. The enclosure also needs enough depth that movement cannot drive the object into the glazing.
Plastics and modern materials
Historic plastics and composite materials can off-gas, shrink, become sticky or embrittle. When the material is uncertain or visibly deteriorating, we treat it as a conservation question rather than improvising a permanent mount.
A shadowbox is a small display case.
Depth, backing, glazing, seals and internal materials all affect the environment around the object. A closed box can protect from dust and touch, but it can also trap emissions from unsuitable materials. The deeper the enclosure and the more complex the object, the more deliberately the materials should be chosen.
When we pause and refer
- Active corrosion or powdering surfaces.
- Mold, insect activity or biological contamination.
- Unstable historic plastics or unknown modern materials.
- Objects with weak repairs or structural cracks.
- Highly valuable archaeological, ethnographic or historic material requiring specialist treatment.
- Any object whose safest support cannot be determined without conservation input.
Installation
The mount and the wall installation are separate systems. We design the internal mount for the object, then size the frame hardware and wall attachment for the total finished weight and site conditions.
Have an object or keepsake you want to frame?
Bring the object and anything that belongs with it. We’ll look at weight, condition and safe attachment points before deciding on the frame.